Video sources
Video sources support
Camlytics Single supports all video sources that fall under these categories:
- Webcams
- Any IP/CCTV camera with ONVIF/RTSP support
- Any video stream that can be accessed via RTSP or HTTP (NVRs, etc.)
- Video files
- Video folders
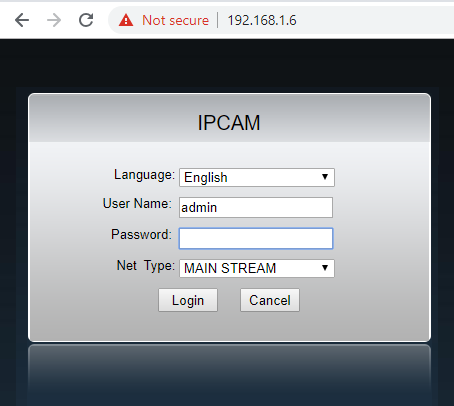
Webcams and IP cameras supporting ONVIF standard are discovered automatically and are available in the device list in the left part of the interface. If you are confident that your camera supports ONVIF but you cannot find it among discovered video sources, first, check that the camera is in the same network with the Camlytics Single machine. Second, make sure that ONVIF discovery is enabled in the web interface of your camera (the setting is usually located in the ONVIF or Security section). It is also recommended to have a user added to the camera. See the sample camera web interface browser login below (192.168.1.6 is the local IP address of the camera).
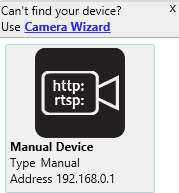
If you still cannot find your camera in the list, you need to add it manually via RTSP or HTTP link. Camera stream link usually looks like rtsp://192.168.1.3/video_device.
The type of the link can usually be obtained through manufacturer's website or through camera's web interface.
If you have a pre-recorded video file and want to perform analytics on it (people counting, motion detection, etc.) you can just add it as a source. The best thing about the file is that you can process it in accelerated (not real-time) mode which allows you to process hours of video in minutes.
You can also process folders with video files in one batch - hundreds of hours of video can processed unattended. Following video file formats are supported: .avi, .mp4, .flv, .mov, .wmv, .mkv, .vob
Managing cameras

If you can find your camera in the "Discovered sources" list, drag and drop it on the gray panel (or double-click it) to create channel.
If you don't see your camera in the sources list, it means it is either located in external network, doesn't have the ONVIF discovery enabled or doesn't support ONVIF protocol at all. In case of no ONVIF support or external network, click the "Manual" button in the bottom to open Camera Wizard to add video source step by step.
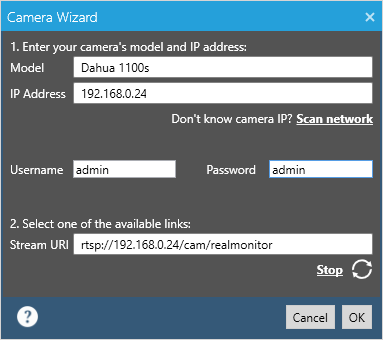
Camera Wizard allows you to choose the correct camera stream address step by step by choosing camera model, ip address (or scan network and selecting correct one), setting stream parameters and checking available stream URLs.
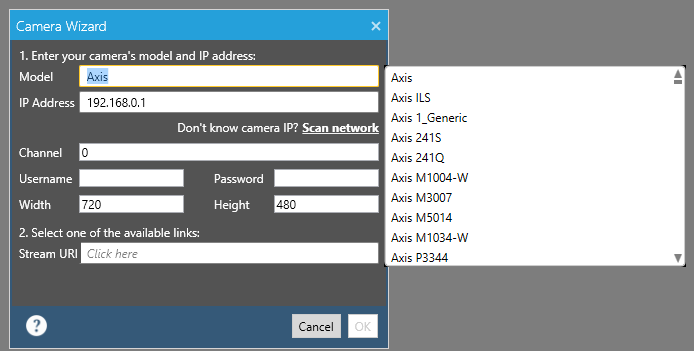
If you know your direct camera stream URL (which you may get through manufacturer's website or through camera's web admin panel)
you can insert it directly into the "URL" field and press OK to add video source. If the URL is password protected you can
add it in the beginning like this: rtsp://admin:password@123.218.82.30/default-Primary0?streamType=u
If you don't see your exact camera model in the list, don't worry, just try other models from the same manufacturer, the RTSP links are often the same among multiple models.
Next you'll see the Manual channel in the sources list. Just drag it to the panel (or double click) to add corresponding video channel.
After adding channel to panel you will see the Usage scenario dialog.
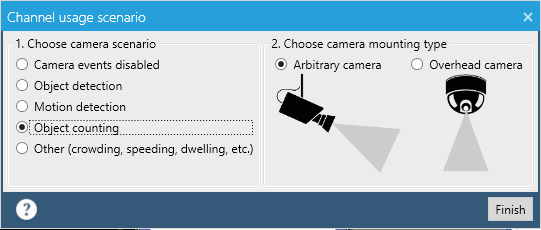
The dialog lets you choose basic camera usage scenario and mounting type for best settings to be set. Below is brief description of usage scenarios:
Camera events disabled - completely disables all video analysis and camera events, except Camera disconnected event. Uses the least amount of CPU of all. Use this option if you want just to view and record your camera.
Object detection - all moving objects in camera view will be detected and tracked - with a corresponding events generated (Object appear/disappear, etc.).
Motion detection - zone with Motion detection scenario will be created by default. Corresponding events will be generated.
Object counting - same as object detection but two counting lines will be created by default.
Other - zone will be created by default. You can specify your own scenario. Read more about zones/lines here.
Camera mounting type -
for more accurate video analytics choose a mounting type of your camera. If a camera looks vertically at the floor, chose Overhead, otherwise choose Tilted type.
You can always change camera settings in future regardless of what option you've chosen (in the channel settings > events > advaned > profiles).
Upon successful connection of the camera, the Calibration window will appear that allows you to adjust tracker object sizes for your camera.
This error means that connection to the camera stream (rtsp or http) has failed. It could happen either due to the invalid stream URL or due to the network settings of the channel. Invalid stream URL can be fixed by choosing different ONVIF profiles or by experimenting with other stream URLs or camera models in the Manual mode. If you are confident that the network stream is correct (it plays well in other players like VLC) you can try altering the stream type (TCP/UDP/HTTP) or stream format.
After adding a channel and adjusting its dimensions you can lock it by clicking on lock icon - this will prevent from further modification of channel window. You can also change its name or view additional info by clicking on Channel settings icon or choosing from channel's dropdown menu.
Channel settings
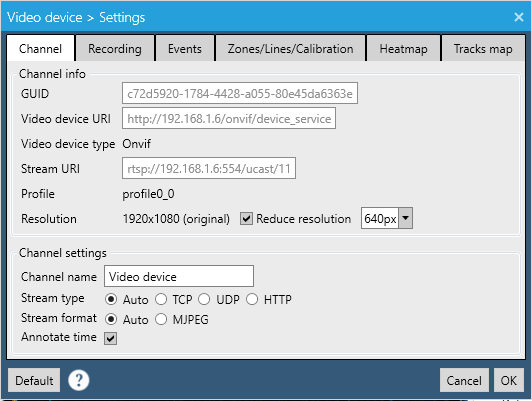
Channel info shows information about network stream - uri, resolution, ONVIF profile, etc.
GUID - the unique channel identifier,
will be used in all kinds of reports, etc.
Video device URI - network endpoint of the video device.
Device type - can be Onvif,
Manual, Webcam, File, Folder.
Stream URI - is a direct video stream URL, every IP camera should have that (Webcams show Moniker ID here).
Profile - is an ONVIF profile of the stream.
Resolution - shows the original channel resolution and the reduced resolution
(640px wide by default). The reduction of resolution affects recordings and screenshots (those are going to be downsampled). By default, it is recommended to leave this setting
enabled because it reduces memory and CPU consumption, especially if the original resolution is Full HD or higher. This setting should not affect
the analytics precision except the cases when you have really small objects in the scene
that are lost during downsampling. If the original resolution is smaller, this setting will not be applied.
Channel name - customizable
channel name.
Stream type - allows to customize stream receiving protocol, you can change it to UDP, TCP or HTTP if
camera picture looks broken (having artifacts, pixelated, edgy or uneven). Changing stream type might also help with frequent camera disconnects.
Stream format - set it as MJPEG if your stream is motion jpeg not working on Auto, otherwise don't change this setting. Annotate time - show local date/time in the top right corner of the video.
In other tabs of the dialog box you can also change recording and camera events settings for this channel.
Video files
Files are a great way to analyze pre-recorded videos and generate events for them - count people, vehicles, detect motion, etc. When real time mode is disabled, video is usually analyzed 5x-7x speed of real time video which makes video files a really useful application.
To create a video file based channel, just double click or drag and drop the file icon into channels space.
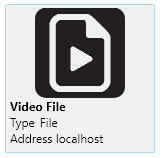
In file dialog choose the location of your video file, all kinds of extensions are supported - .avi, .mp4, .flv, .mov, .wmv, .mkv, .vob

After adding channel and configuring analytics file will start playing automatically. If you want to re-run analytics, just hit the Refresh icon and the playback will start all over again.
By default video will play fast - to speed up the analytics process, if you want it to play real time - just set the corresponding checkbox in channel settings.
After the video finishes playing it goes back to the first frame and stops. All the events generated during the play are saved into the database so you can access them by clicking on the Statistics icon any time. If you want to replay the video and re-generate all events without keeping the old ones you can just delete them (Delete button in Statistics) once the video is stopped or paused. You can restart video at any moment by clicking on the Refresh button.
Camlytics Single reads the date-time metadata from your video files and sets it as a beginning for the events timestamps. If the metadata is not found, the file creation date is used. If you need the timestamps to be altered you can just edit the file metadata and change the date-time there.
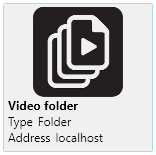
Video folders
Folder channel type allows processing hundreds of files of video unattended. This feature is available in premium version only.
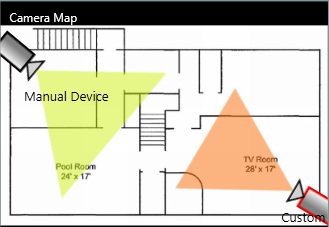
Floorplans
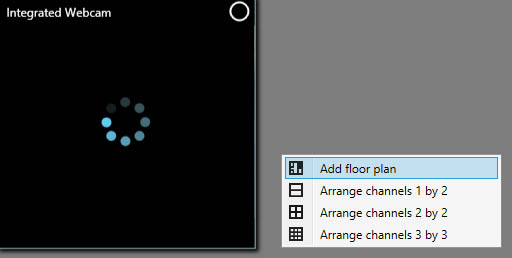
Camlytics Single supports floorplans, or camera maps for easier navigation and better event notifications. You can add floorplan by right clicking on channels panel and choosing Add floor plan.
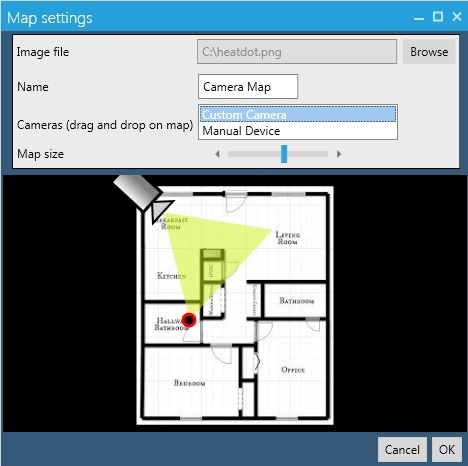
In opened dialog box, choose the background image, change plan title, drag and drop cameras from the list on the selected image. You can adjust camera orientation and coverage by dragging camera view controls.
To adjust cameras sizes on the map, use the Map size scroll.
After floor plan has been added, new events will cause cameras on map blink with red color. Also, when camera is highlighted by mouse, corresponding channel's name will also be highlighted with red color.