Team
Introduction
Inviting a team member
To invite someone to your team:
- Go to the Team section.
- Click the Add team member button.
- Enter the email of the person you want to invite.
- Note: The user must not already be registered in Camlytics. If the email is already linked to an existing account, use a different email for the invitation.
- Assign permissions (see below).
- Click Create.
Once the invitation is sent, the user will receive an email with a registration link. Following this link, they can register as a Team Member under your account.
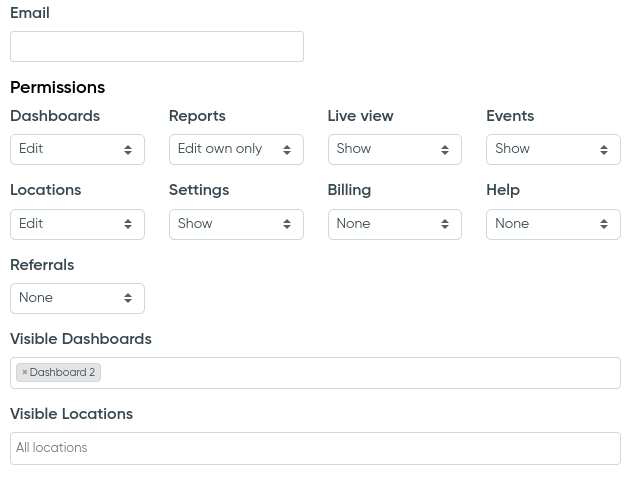
Permissions
When inviting a team member, you can assign permissions to control which parts of the system they can access and what actions they can perform. Each permission can be set to:
- None – no access
- Show – view only
- Edit – full access (create, edit, delete)
- Edit own only – available for reports, limits editing to reports the user created
Available permission categories:
- Dashboards
- Reports
- Live view
- Events
- Locations
- Settings
- Billing
- Help
You can also restrict access to specific dashboards and locations using the Visible Dashboards and Visible Locations fields.
Team member list
After a user accepts the invitation and registers, they will appear in the Team members table.
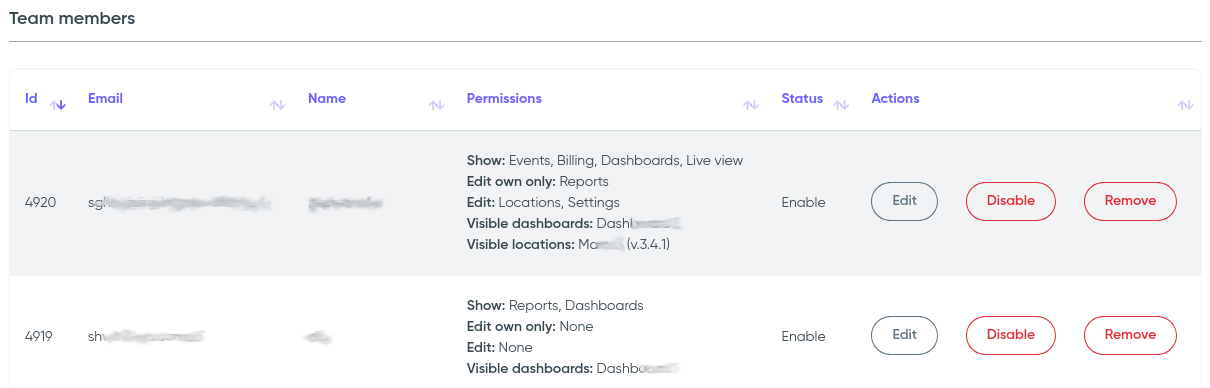
The table shows the following details for each team member:
- Name (set during registration)
- Permissions – which modules are accessible and with what access level
- Status – indicates whether the user is active
You can manage each team member using the available action buttons:
- Edit – change the user’s permissions, visible dashboards, or locations
- Disable – temporarily suspend access without deleting the account
- Remove – permanently delete the user from your team
This makes it easy to collaborate while keeping full control over access and visibility across your account.