Recording
Recording settings
Camlytics Service has 4 types of recording mode:
- No Recording. When checked and applied all recording for the camera is stopped. Triggered by default.
- Permanent recording. Starts recording immediately and never stops.
- Scheduled recording. Starts recording as soon as schedule condition is met.
- Recording on events. Makes recordings either of single events (Line crossed, etc.) or of long lasting events (Object appear - Object disappear).
Regardless of recording type you can choose output video bitrate and FPS. Bitrate is set 1,000 Kbps by default, which is enough for medium quality video, for HD and full HD use 1,500 - 2,000 Kbpps. The higher the bitrate - the higher the output file size will be. Default FPS value is 15, if you desire to reduce target video size, you can reduce this value. All encoding is made with MPEG4 codec to reach maximum performance.
Recorded video is written by chunks (100Mb each by default) to prevent data loss. You can regulate chunk size in main application settings. You can also change the destination of the media files, but ensure that chosen disk drive has enough space.
Permanent recording
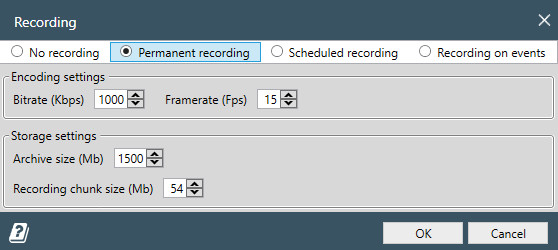
This option starts recording immediately. You can stop the recording by choosing the No recording radio button.
Recording on schedule
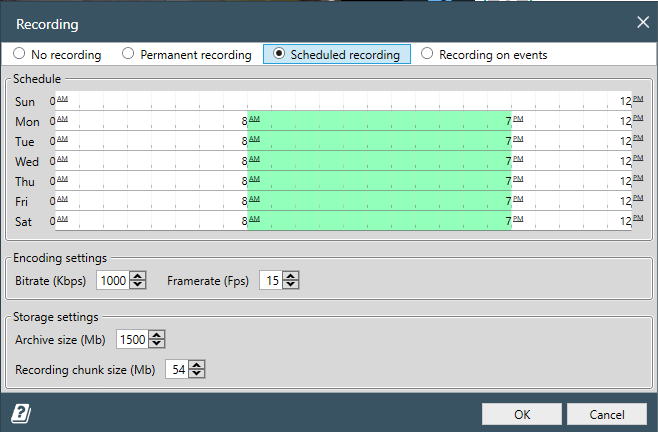
This option starts recording as soon as schedule condition is met.
You can organize recording within specific timespan within specific days of week.
If start and finish hours are equal, recording will be performed during all day non-stop.
Recording on events
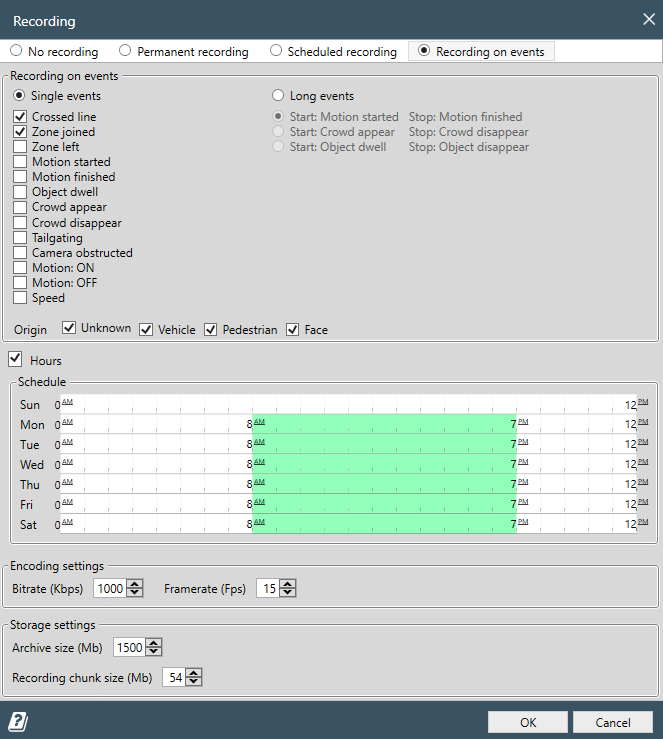
This option is very useful for recording all important activity and ignoring all non-relevant camera events, saving huge amounts of disk space. There are two types of such recording: on single events and on long events.
Single events

The list of single events includes:
Crossed line, Zone joined, Zone left,
Motion started, Motion finished, Object dwell,
Crowd appear, Crowd disappear, Tailgating,
Camera obstructed, Motion ON, Motion OFF,
Speed.
Output video will contain approx 2 seconds of footage before
the event and 2 seconds of footage after the event.
Also, be aware of the fact that Single events causes high memory
consumption so Long events mode is often preferred.
Long events

Choose this option if you want to record long lasting events, for example when object stays within predefined region. The list of such event pairs are:
Motion started-Motion finishedCrowd appear-Crowd disappearObject dwell-Object disappear
Output video will contain footage between the events.
There are also two filters available: Hours and Origin. With Hours you can define the time range recording should take place and with Origin you can filter out unwanted object types (like pedestrians on a road). Origin is only supported with events that have object ID and with AI detection profiles only. Read more on analytical events and object classification here.
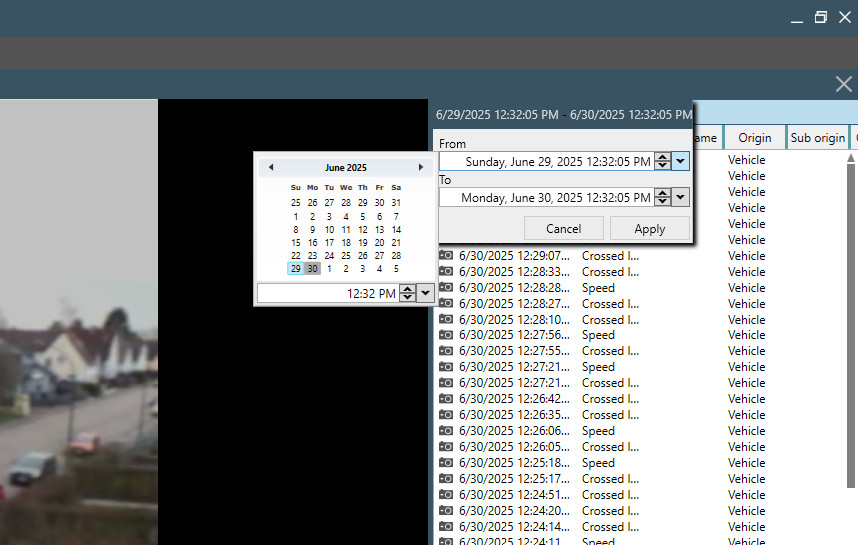
Video archive
Open archive by clicking on icon in the channel tools or selecting it from channel's dropdown menu.
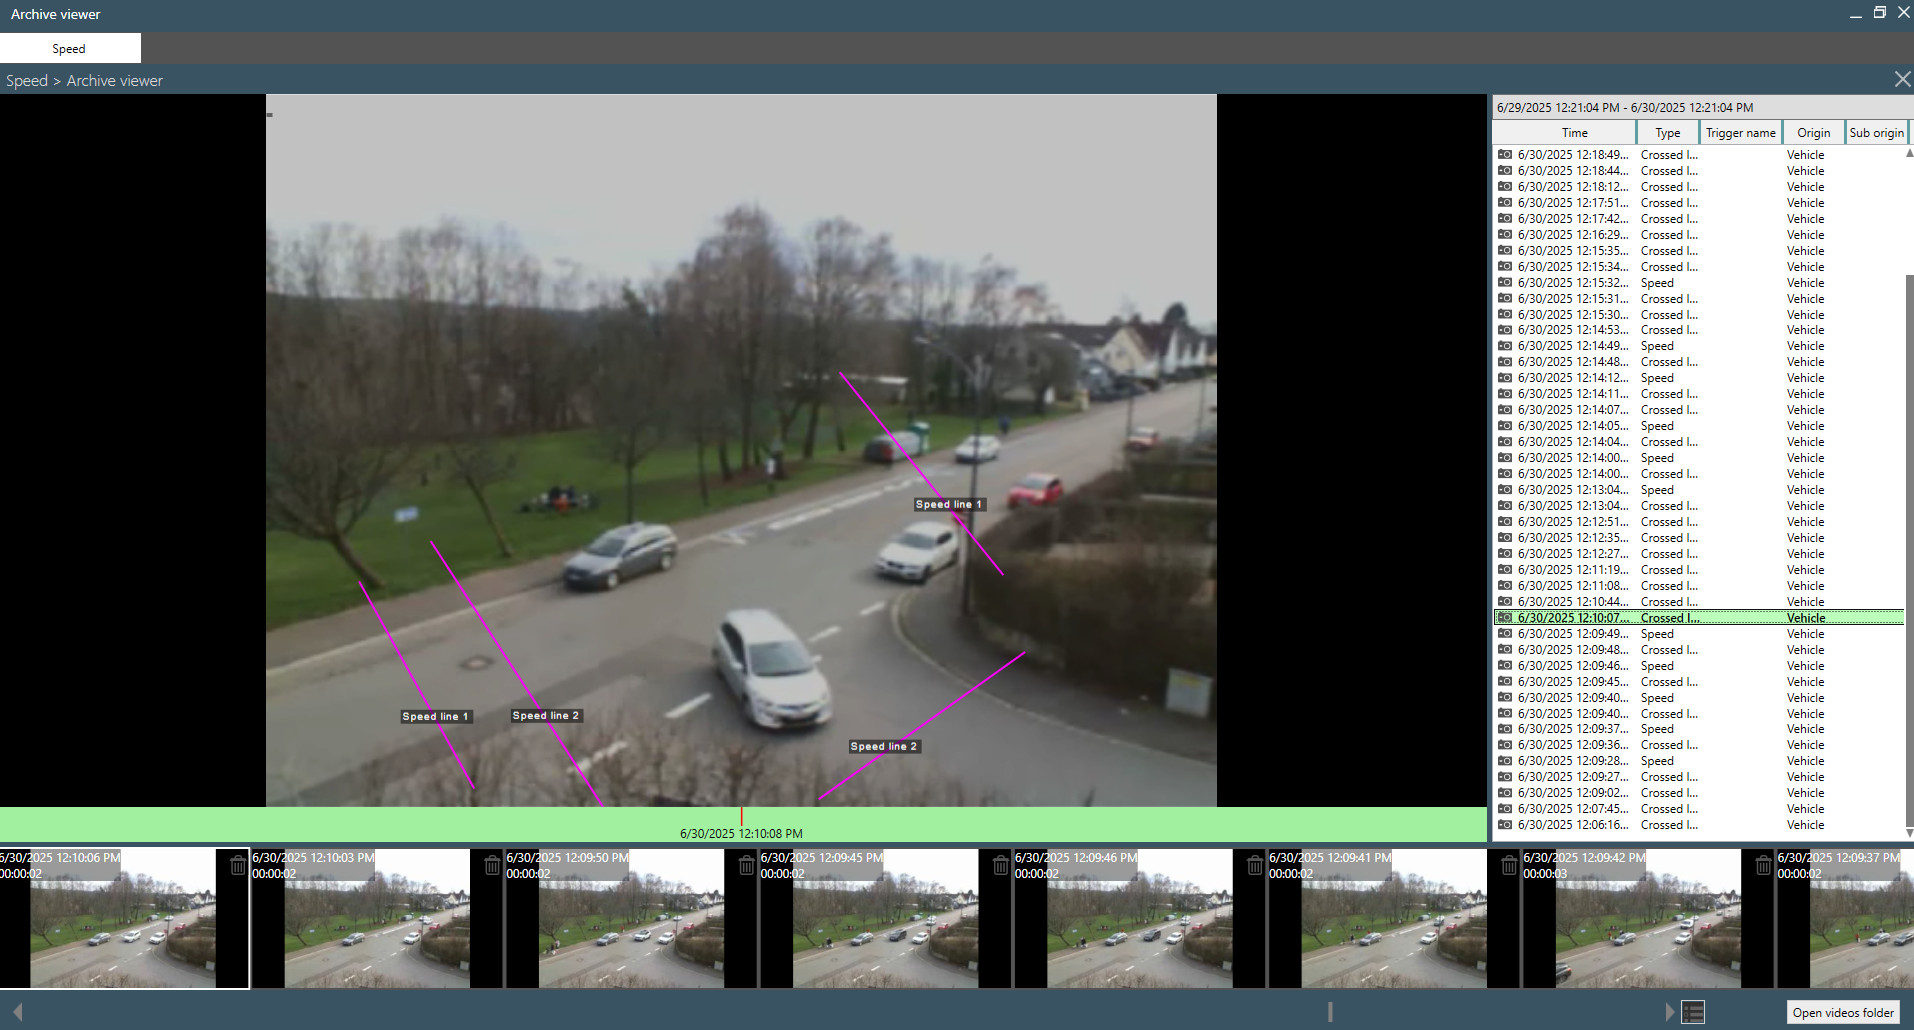
Archive Viewer allows you to view, delete, and filter all recordings from the selected channel. At the bottom, you’ll see thumbnails of all recorded videos. To open a video, click on its preview; to delete it, click the trash icon.
To filter videos by date, enter the desired date and time as shown in the screenshot below.